Buns And Plaits
During our first studio session for Hair and Postiche we
were taught six different hairstyles and then asked to recreate them ourselves.
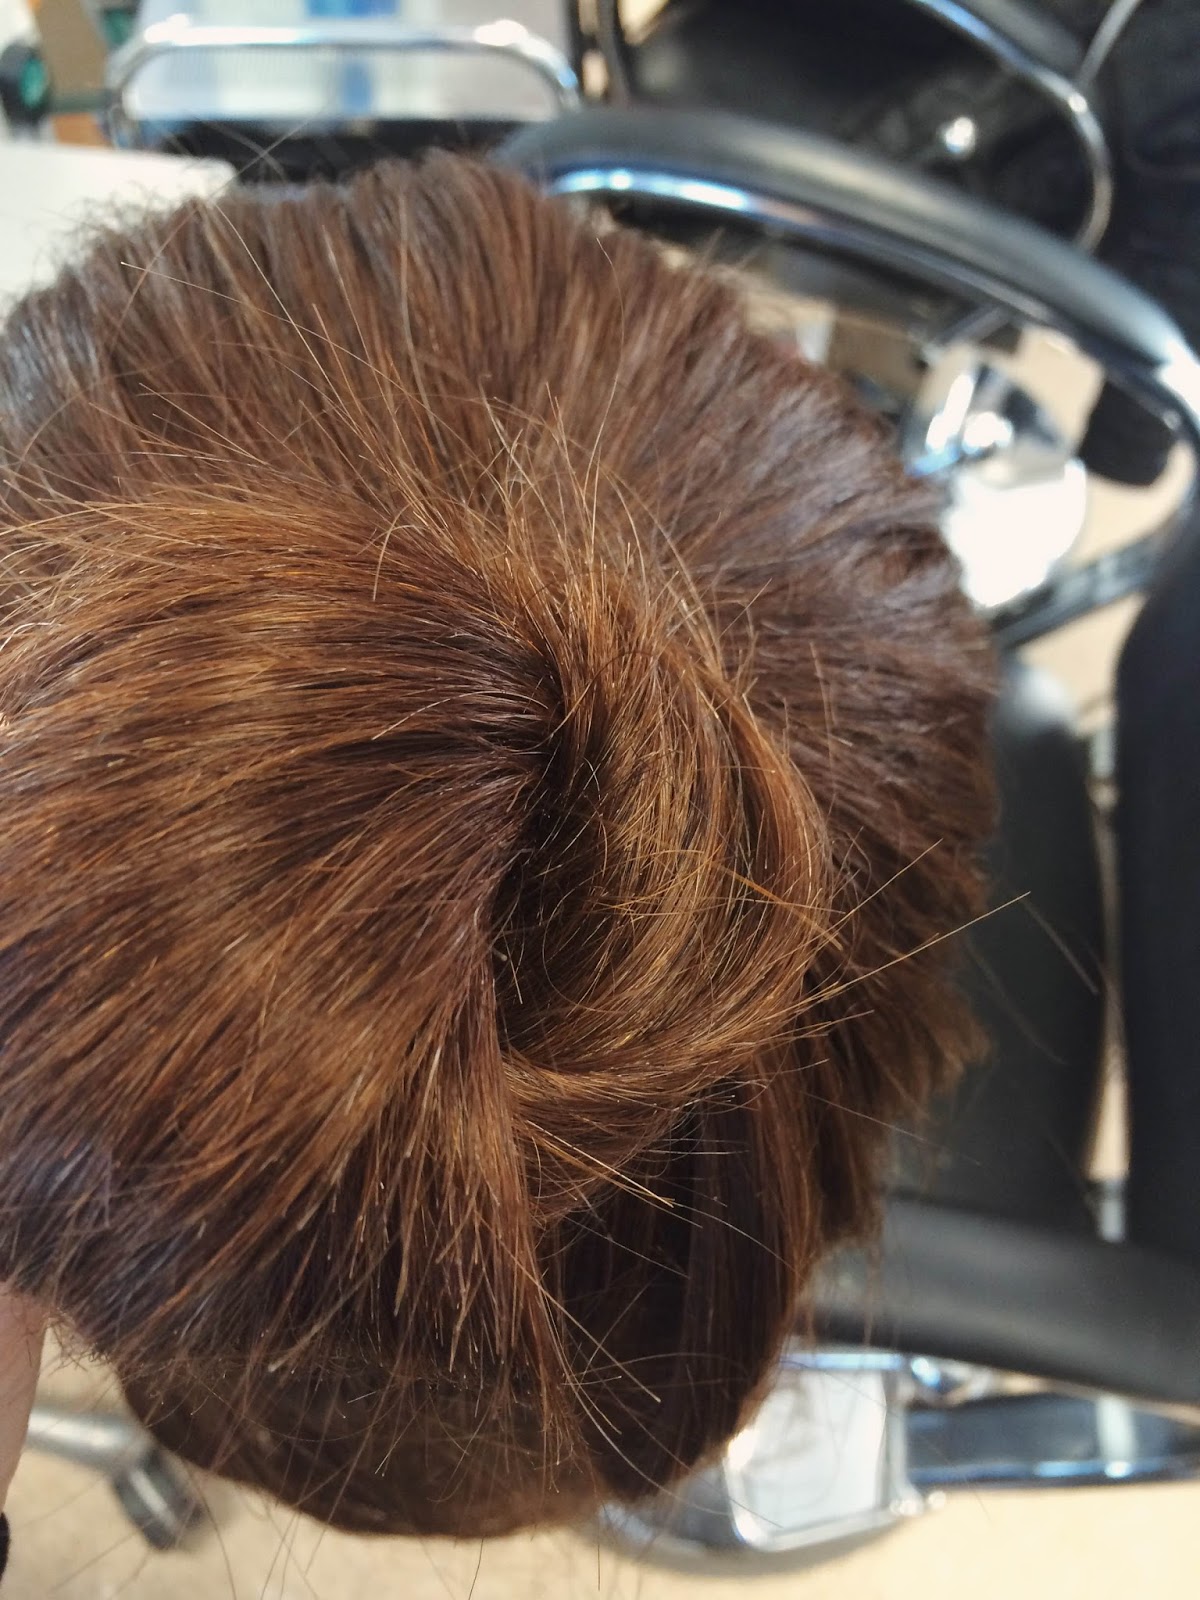
Large Bun
The first was a simple bun, in which we had to section the hair from
just above the ears as the rest of the hair was too short to be able to go into
the bun. After sectioning the hair, I brushed through the top half and tied it
up using a small elastic band. Again I split the hair in the pony tail into
four even sections and taking the one of the quarters I held it up and began to
back comb the piece. Back combing the side facing out from the pony tail, once
this was done I began to bend the piece of hair so it formed a semicircle with
the top of the head. The back combed side was on the inside of the loop and
then I set it in place using two Kirby grips. I then did the same with the
other three of the quarters. After all sections looked relatively even I then
took a hair pin that had two straight prongs and proceeded to bring together
the edge of two of the loops. The hair moved easily however didn’t lose its
shape as I had secured it well using the Kirby grips. It took time to get the
hair to flare out evenly, however once I had done so I secured each section in
place using the grip with straight prongs. Overall I was extremely impressed
with the outcome of the bun. I feel like it could be used within a number of
looks and fit a variety of themes if changed slightly, for example a very
simple Elizabethan hairstyle.
Twist Bun
The second hairstyle we were taught was a twist bun. This
was done using the same ponytail as previously used in the other bun. However
instead of backcombing the hair we brushed it through and then pulled the end
of the ponytail so it was taught from the elastic hair tie to the ends of the
hair. Then twisted the pony tail around, you could clearly see the spirals in
the hair. Then with the twisted pony tail we wound it around the base of the
pony tail, it formed a loop around the elastic band and I was able to secure it
in place using a Kirby grip and a straight pronged hair grip. This bun does not
look as neat as the previous bun and it wouldn’t be suitable for certain themes
or looks, in particular period hairstyles however if a messy up-do was required
I would feel confident in using a bun like this as it produced a messy look. I
also think it may have looked better if done using longer hair as the bun would
be larger.

Plait Bun
The third bun we were shown was created using a plait as the
bun. Again using the same ponytail as the base
we began to plait it. Once the plait had reached the ends of the hair
we were able to wrap it around the base of the pony tail. Once in a suitable
position I pinned it using hair grips. I found this particular style of bun a
lot harder to work with, as I found the plait was quite hard to shape into a
bun and for it to stay secured. However after some practice I feel it may
become easier for me to get the outcome that I would like to achieve.
Classic Plait
 After being taught how to do three styles of bun, we were then taught
about how to do three different styles of plaits. The first one we were taught
was a simple plait and one that I have done on myself since being a young
child. To create this look you must section the hair into three sections, all
with the same amount of hair in each third. You then take one of the outer
thirds, in the case I took the right, and bring it over the middle third and
take it under the other outer third, which is in my left hand. I was then left
with my original middle third being on the right hand side, the third on my
left was then in the middle and my third on the right is now on my left. I then
continued this process down the length of the hair. I find that this style of
plait is very simple and easy to create and looks extremely neat. I don’t think
it wold be suitable for certain period hairstyles, however I think it would be
possible to incorporate it into an Elizabethan hairstyle in some way.
After being taught how to do three styles of bun, we were then taught
about how to do three different styles of plaits. The first one we were taught
was a simple plait and one that I have done on myself since being a young
child. To create this look you must section the hair into three sections, all
with the same amount of hair in each third. You then take one of the outer
thirds, in the case I took the right, and bring it over the middle third and
take it under the other outer third, which is in my left hand. I was then left
with my original middle third being on the right hand side, the third on my
left was then in the middle and my third on the right is now on my left. I then
continued this process down the length of the hair. I find that this style of
plait is very simple and easy to create and looks extremely neat. I don’t think
it wold be suitable for certain period hairstyles, however I think it would be
possible to incorporate it into an Elizabethan hairstyle in some way.
French Plait
The second style of plait we were taught was a French plait, a
hairstyle that is extremely suitable for period hair and in particular
Elizabethan hairstyles. I did find difficulty in creating a French plait
however with practice I have found it much easier and I believe that with
further practice it will come to me easily. As with the simple plait you start
with three sections of hair, however this time I started on one side of the
head, at the top of the parting. I then used the same process as before and crossed
over from right to the left, middle to the right and left to the middle.
However before repeating this step I added in another section of hair from the
right hand side and crossed it over too, I also did this when taking the hair
now on the left hand side, making both pieces slightly bigger when crossing
them over. I repeated this with each section that I moved over, meaning more
hair was added each time a third was being moved from one corner to another.
This meant that as I went further down the side of the head more hair was in
each third. And when I got to the bottom of the hairline, on the neck, I
proceeded to plait the hair using the simple plait method. I love the look of a
French plait and I think it’d work perfectly with period hairstyles. I also
believe that with more practice I will be able to be more creative with my
French plaiting.


Fishtail Plait
The final plait we were taught was a fishtail plait, one
that I have struggled with in the past when attempting it on myself or friends.
The process is simple however it is very time consuming, especially on longer
hair, which therefore means it would be unsuitable if a hairstyle needed to be
done quickly. To create the fishtail plait you need to brush through the hair
and make sure there are no nots or tangles as this will help the final look.
Then section the hair you wish to plait in two sections, with the same amount
of hair in each half. Then you take a small amount of hair from outer side of
one of the sections of hair and pass it over its original side and join it into
the other section. You then repeat the same thing however with the other
section of hair, again taking a small piece from the outside of a section of
hair. You must continue this for the full length of the hair and you must only
take small sections of hair. If you pass across larger sections it will not
look like a fishtail but sometimes like a normal plait. The process takes a
long time before you see any significant results however when creating a
fishtail plait you must persevere and eventually the look will come together.
These are also easily adapted for example you can make them look messy or neat
depending on the specific look you were trying to achieve.


No comments:
Post a Comment